I am a big fan of HomeKit and Apple’s effort to have one central app to control smart home devices. While it has its flaws and limitations, the main value for my household is simply that all of my smart home accessories are centralized in Apple’s Home app. I don’t need to install anything on family members’ phones, and it minimizes tech support from me.
The one thing that was not natively available through HomeKit was my garage door opener. I used meross with HomeKit for a few months, but I was having reliability issues with flaky wifi, and it required using a door sensor, which was also unreliable when wind would move the gate just enough to trip the sensor. A better option would have been ratgdo, but I really wanted a wired network connection. That’s when I settled on the LiftMaster 828LM internet gateway.
For a while, I was content using the 828LM with the homebridge-myq plugin, but it has since been deprecated due to myQ locking down its API. That forced me to use the myQ mobile app, which is really just a canvas to shove ads into. It’s pretty slow to load and can’t do any automation with HomeKit.
Hardware
The 828LM is a simple appliance that connects to the network over Ethernet and communicates with compatible garage-door and gate operators over RF in the 900 MHz band using the myQ protocol. The MCU is a PIC18F67J60 with 128 KiB of program flash and 3,808 bytes of RAM. It handles the network stack and controls a Si4432 radio for RF communication. For storage, there is a 32 Kbit (4 KiB) 25AA320A EEPROM chip and a 4 Mbit (512 KiB) SST25VF040B flash chip on the reverse side.
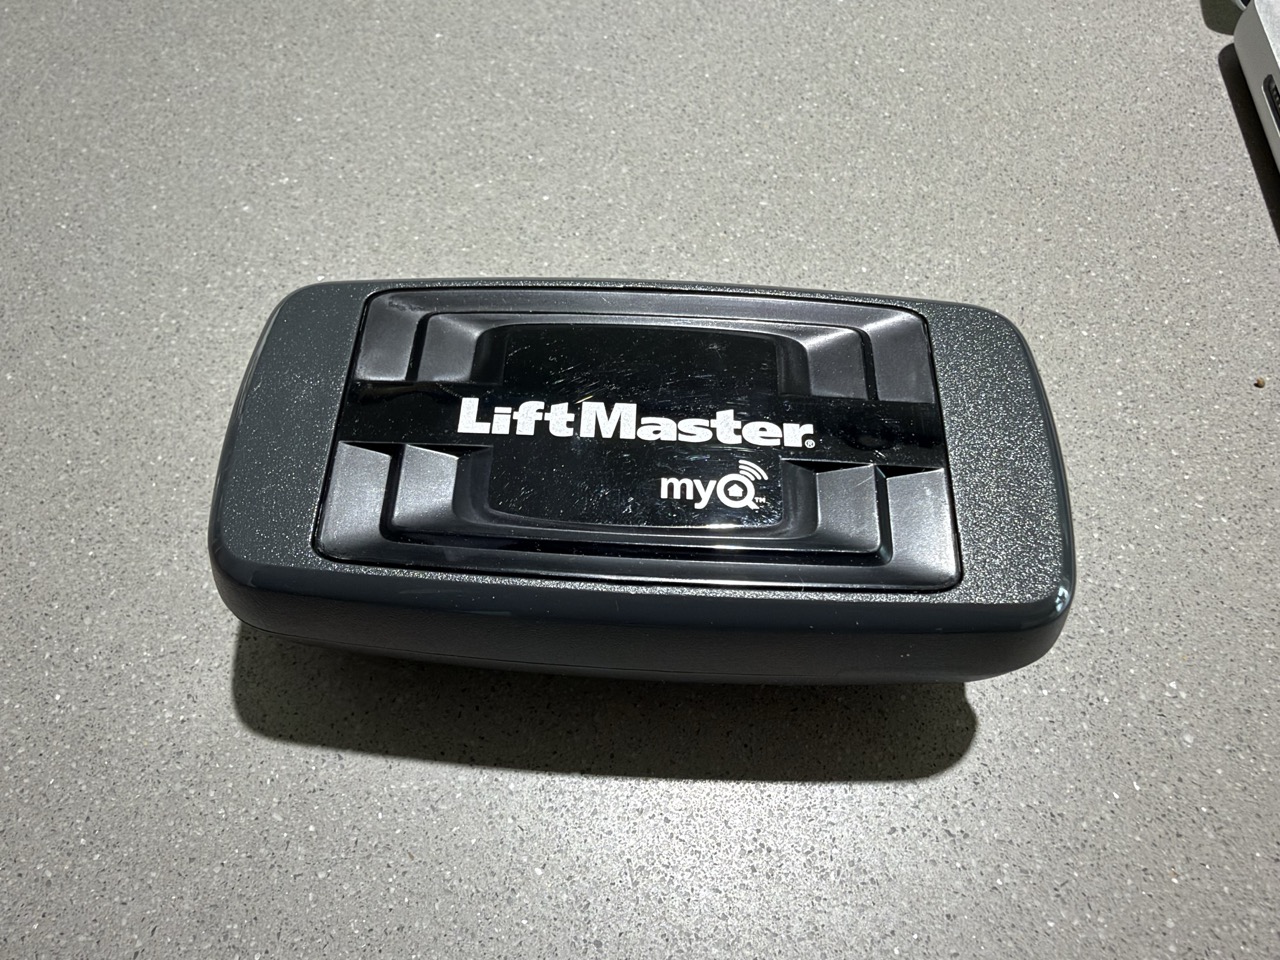
LiftMaster 828LM Internet Gateway
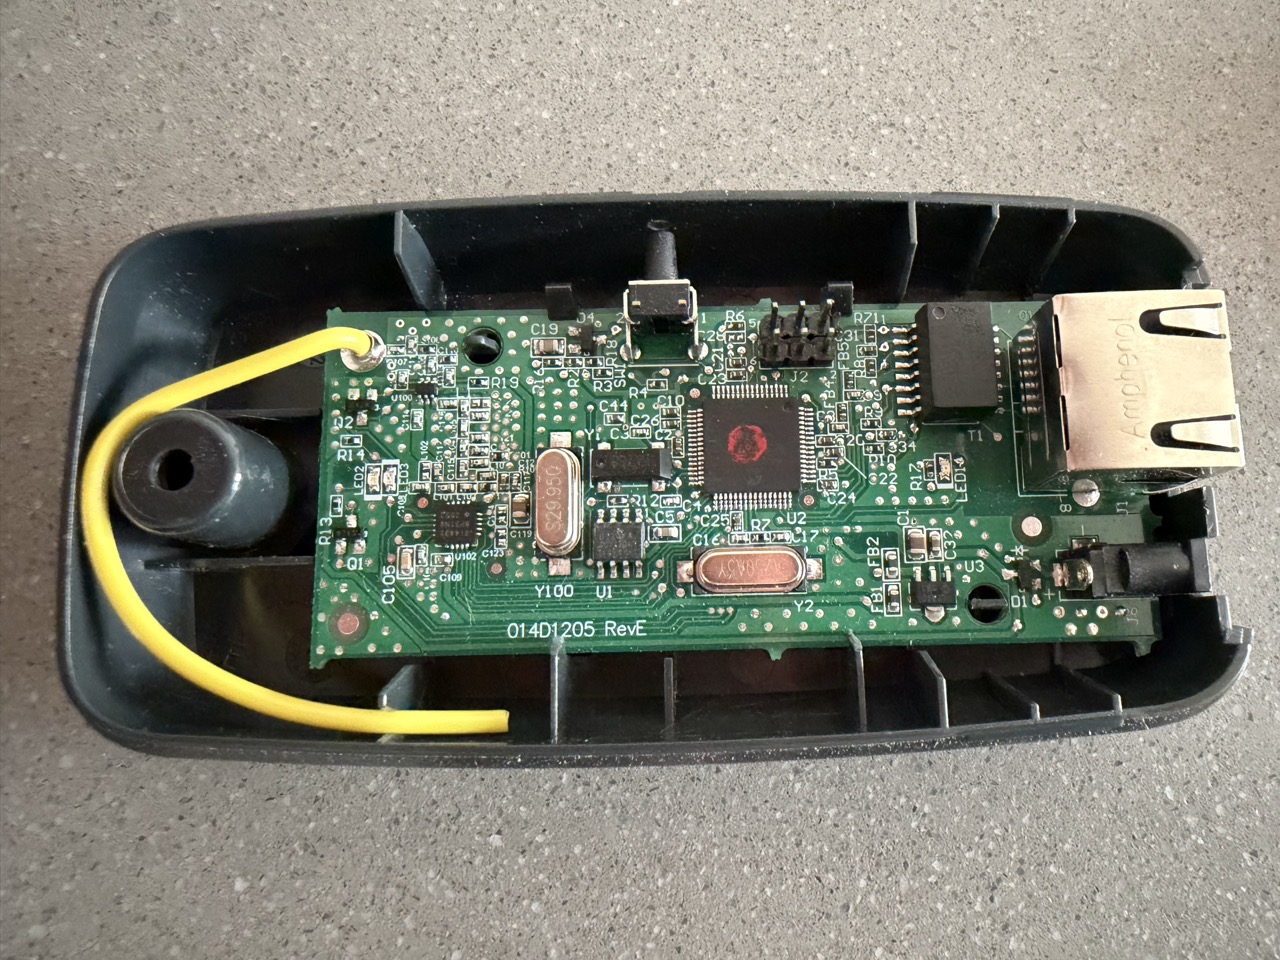
Board with visible chips: center PIC18F67J60 MCU, left center EEPROM, and left Si4432 radio
My first attempt was to talk to the device directly over the network, but there were no open ports to do anything useful. Capturing TCP packets also yielded little value since the connection is over TLS.
Dumping the firmware
The board’s J2 header block can be used for programming the MCU. I soldered pin headers to make this more accessible. After tracing the pins to the MCU legs, I needed a programmer to read it. One option is Microchip’s PICkit 5 programmer, but I didn’t want to spend any money on new hardware, so instead I spent orders of magnitude more on tokens to build a Flipper Zero app that can read and write the PIC18F67J60, using the datasheet as a reference.
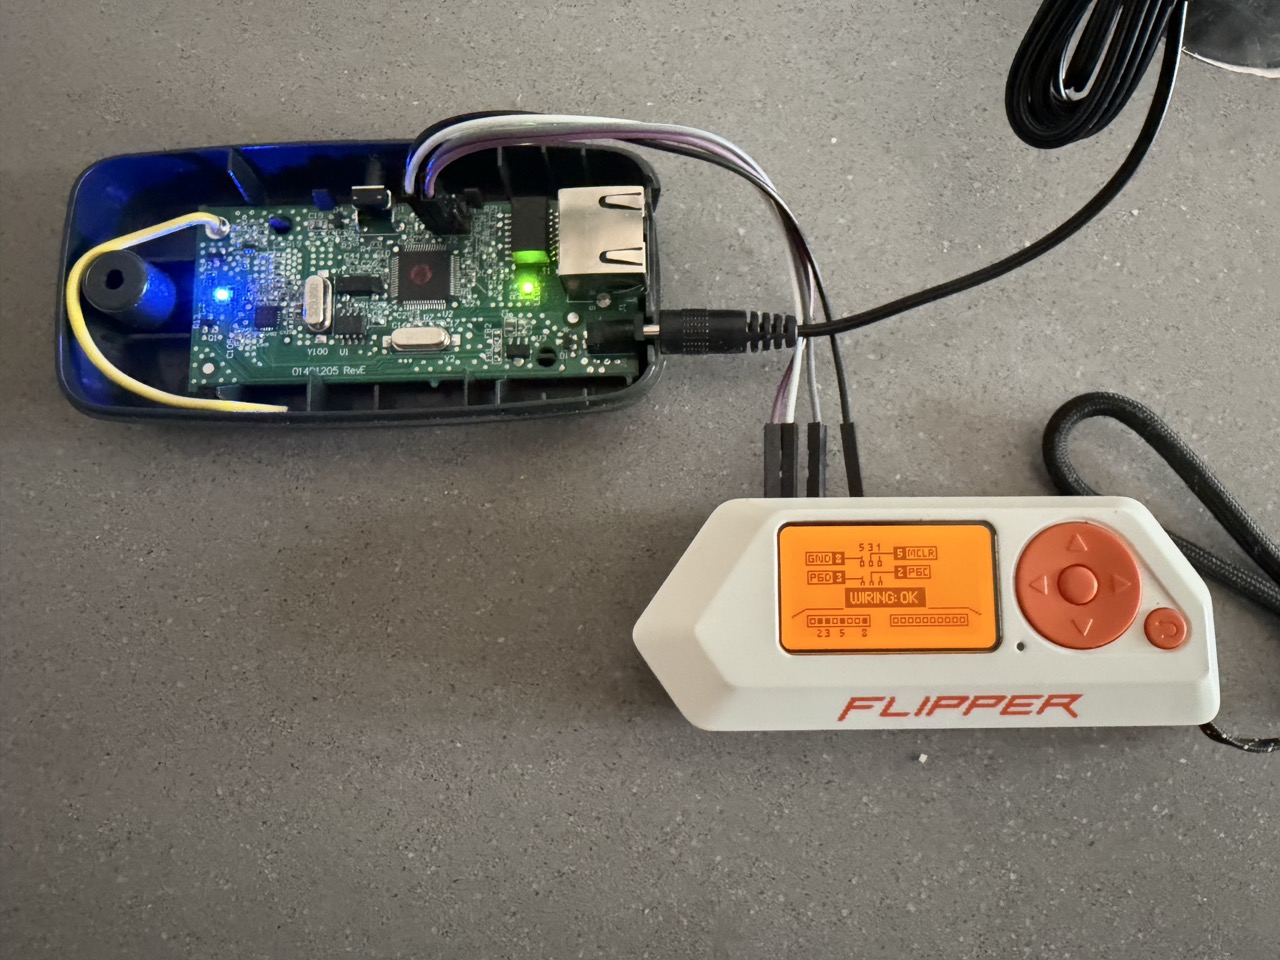
J2 header pins connected to the Flipper’s GPIO
Dumping the firmware was straightforward, though I expected it to be blocked by the chip’s code protection. To my surprise, the code protection was not enabled, and the firmware was successfully dumped intact.
Failed reverse engineering attempts
My initial goal was to decompile and reverse engineer the firmware so that I could enable LAN access directly, eliminate the need for myQ’s cloud service, never have to see another myQ ad, and keep my data private. Reverse engineering binary dumps is way easier now with LLMs, but this 8-bit MCU with a Harvard architecture proved to be especially tricky.
The plan was to rewrite the network stack to interface with my own server and keep the RF stack and behavior identical to the stock firmware. I was able to get a basic HTTP server up and running, but the RF stack turned out to be a dead end, mostly due to my complete lack of expertise with RF, which made me a blind guide for Opus 4.8 (the best model at the time).
After several attempts at reconstructing the C code, I eventually changed the strategy to leave the firmware as is and instead write my own MQTT service to talk to the 828LM. The device uses TLS with a pre-shared key, which is baked into the firmware. The previous work with trying to reconstruct source code uncovered the PSK, letting me decrypt and inspect the traffic and giving me a path forward to building a minimal MQTT server and bypassing the cloud service altogether.
Homebridge plugin
With the goal of HomeKit compatibility, I went down the path of building a Homebridge plugin. The plugin serves as the minimal MQTT server for the 828LM, translates HomeKit commands into gateway commands, and reports state changes back to HomeKit.
What I used:
- 828LM stock firmware
- PSK extracted from the binary dump
- Local DNS override for the 828LM’s cloud hostname (
connect-0.cloud.myqdevice.com) to resolve to my Homebridge server on my LAN
MQTT service
The gateway uses MQTT 3.1.1 over TLS 1.2 on port 8883. The plugin implements the server behavior the gateway expects, including connection acknowledgment, subscriptions, keepalives, and the application messages carried in MQTT publications.
The gateway initiates its usual connection, but reaches out to my local Homebridge server instead of the cloud service.
To reverse engineer the 828LM MQTT protocol, I built a quick and dirty debug panel so I can see the messages passed back and forth between the plugin and the 828LM gateway. It was invaluable to have an explainer for the binary payloads as I learned more about the protocol. The ratgdo project was my primary reference for much of the payload decoding. The wired and RF protocols share enough Security+ 2.0 concepts and payload structure for it to be valuable.
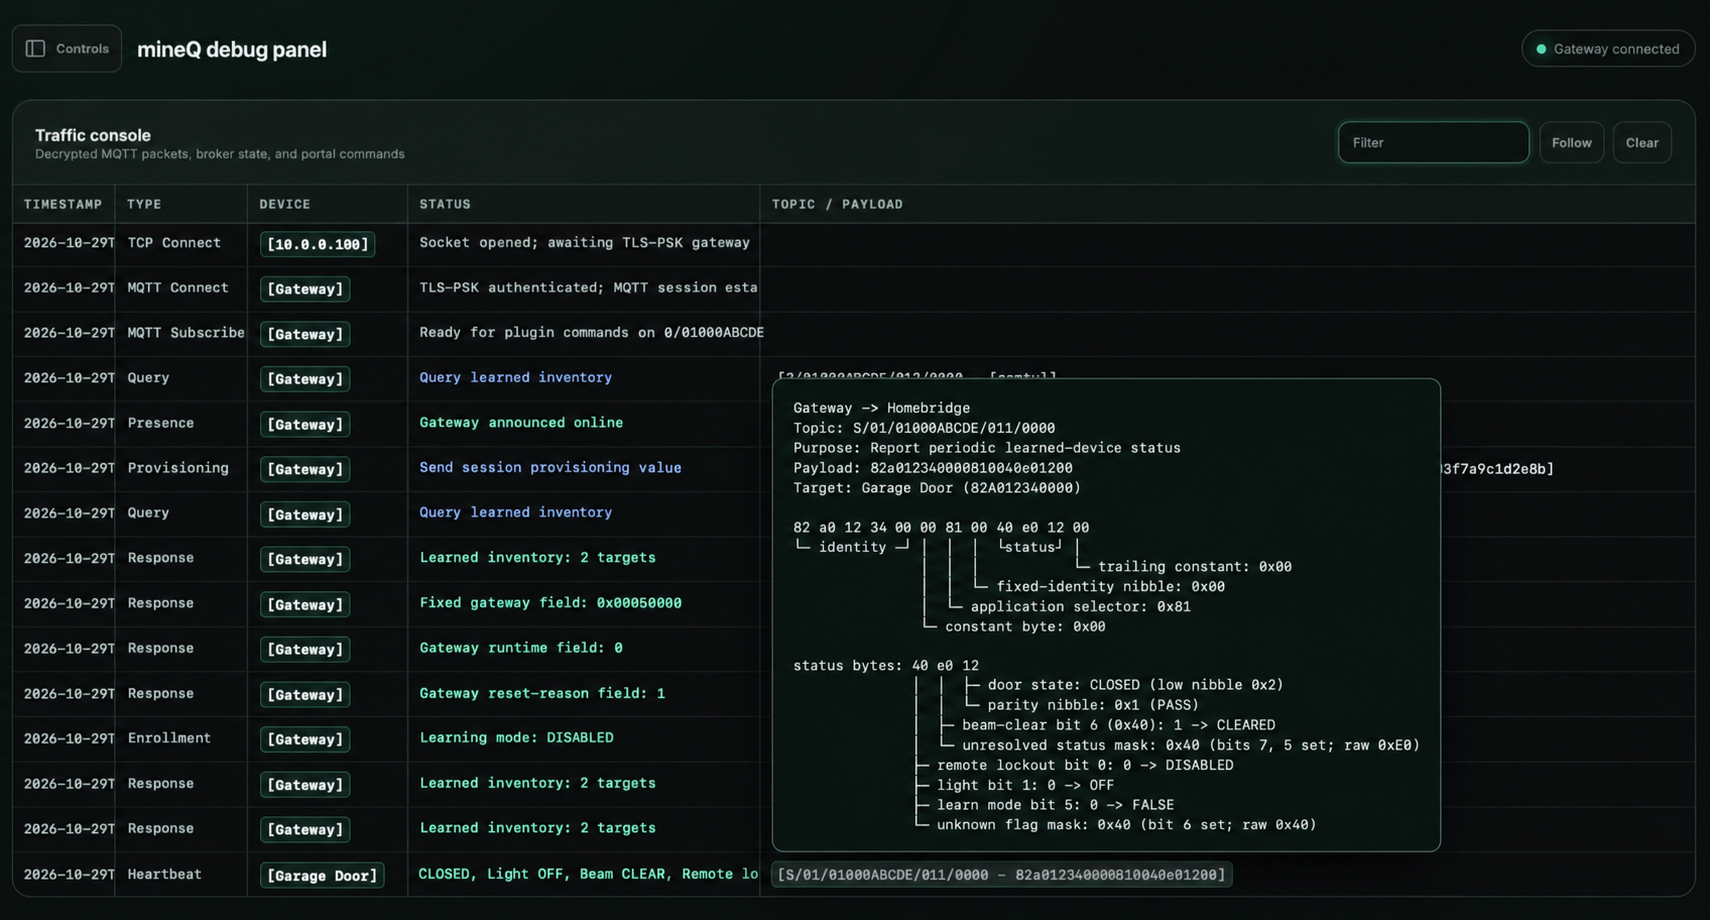
Debug panel in Codex green showing traffic between the plugin and the gateway. Identifiers replaced for privacy.
Commands to the gateway use topics under G/{gateway_id}/…; reports from it use S/01/{gateway_id}/…. For example:
| Purpose | Topic | Payload |
|---|---|---|
| Query paired operators | G/{gateway_id}/013/0008 | Empty |
| Return paired operators | S/01/{gateway_id}/014/0008 | Consecutive six-byte operator IDs |
| Send a command | G/{gateway_id}/011/0000 | Operator ID followed by command bytes |
| Report opener status | S/01/{gateway_id}/011/0000 | Operator ID followed by status bytes |
Other observations
The PIC18F MCU is cheap and limited in capabilities. The application payloads use compact binary data instead of JSON, which is quite elegant at the expense of human readability.
All of the myQ enabled openers I experimented with broadcast a heartbeat over RF every 5 minutes. The status report includes a 3-byte status field: door state, light state, obstruction sensor state, remote lockout state, and learn mode state. This helps keep the door state current in the Home app in case an initial open/close message gets missed.
Since all network calls are done locally on my network, the plugin feels much faster than the original homebridge-myq plugin, which relied on the reverse-engineered web APIs. Tapping open/close on my garage door in the Home app feels instant (1-2 seconds), not quite as fast as using the garage door remote, but pretty darn close.
Plugin current state
The project has reached a useful point for my personal use as a local Homebridge integration around the existing 828LM firmware. I have not published the plugin in the official Homebridge plugin directory, but may pick this up again if there is any interest.
My goal of eliminating the need for the myQ app was successful. The plugin supports opening and closing, and reports sensor and door obstruction conditions to HomeKit. The clunkier bits are in new device onboarding where pairing a garage door with the gateway needs to be done through the debug panel.
Future work
It would be awesome to have standalone HomeKit support directly on the 828LM, but the MCU’s limited RAM and program storage, along with the lack of dedicated crypto support, would make that a difficult if not impossible fit. Realistically, a custom board with a more capable MCU would probably be necessary. A nice hardware project for another time.